DIY, Fall Door Swag
Items Needed
- Grapevine swag or several swags that you can string together depending on the length you want around your door. The door tops are beautiful.
(Make your own) Cut a wreath in 1/2 & secure ends with zip ties to keep from unwinding or make a swag from grapevines they grow wild in New Jersey.
- 4 Rolls of 18in x 15ft mesh ribbon 2 rolls of each color I used 2 gold & 2 brown
- Bow, make or buy or buy 1 extra roll of the above mesh ribbon and make your own
(I used burlap the was 9in x 15ft to make my own) - Fall flowers, plastic pumpkins & gourds, or fall swags
- 50-75 8-inch clear zip ties
- Scissors
Items Needed to secure grapevine swag to the door frame
- Screw-driver
- Sheetrock screws
- 20 8-inch clear zip ties
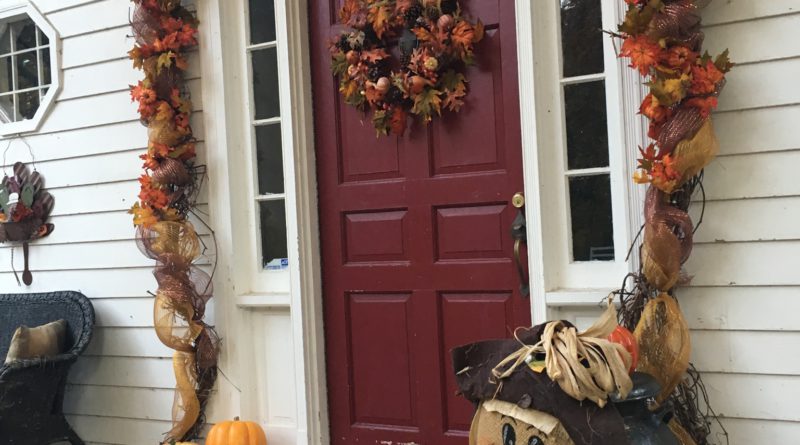
- Start with a Grapevine swag and secure it with screws and zip ties to your door frame.
The swag works great as a base for holiday decorations.
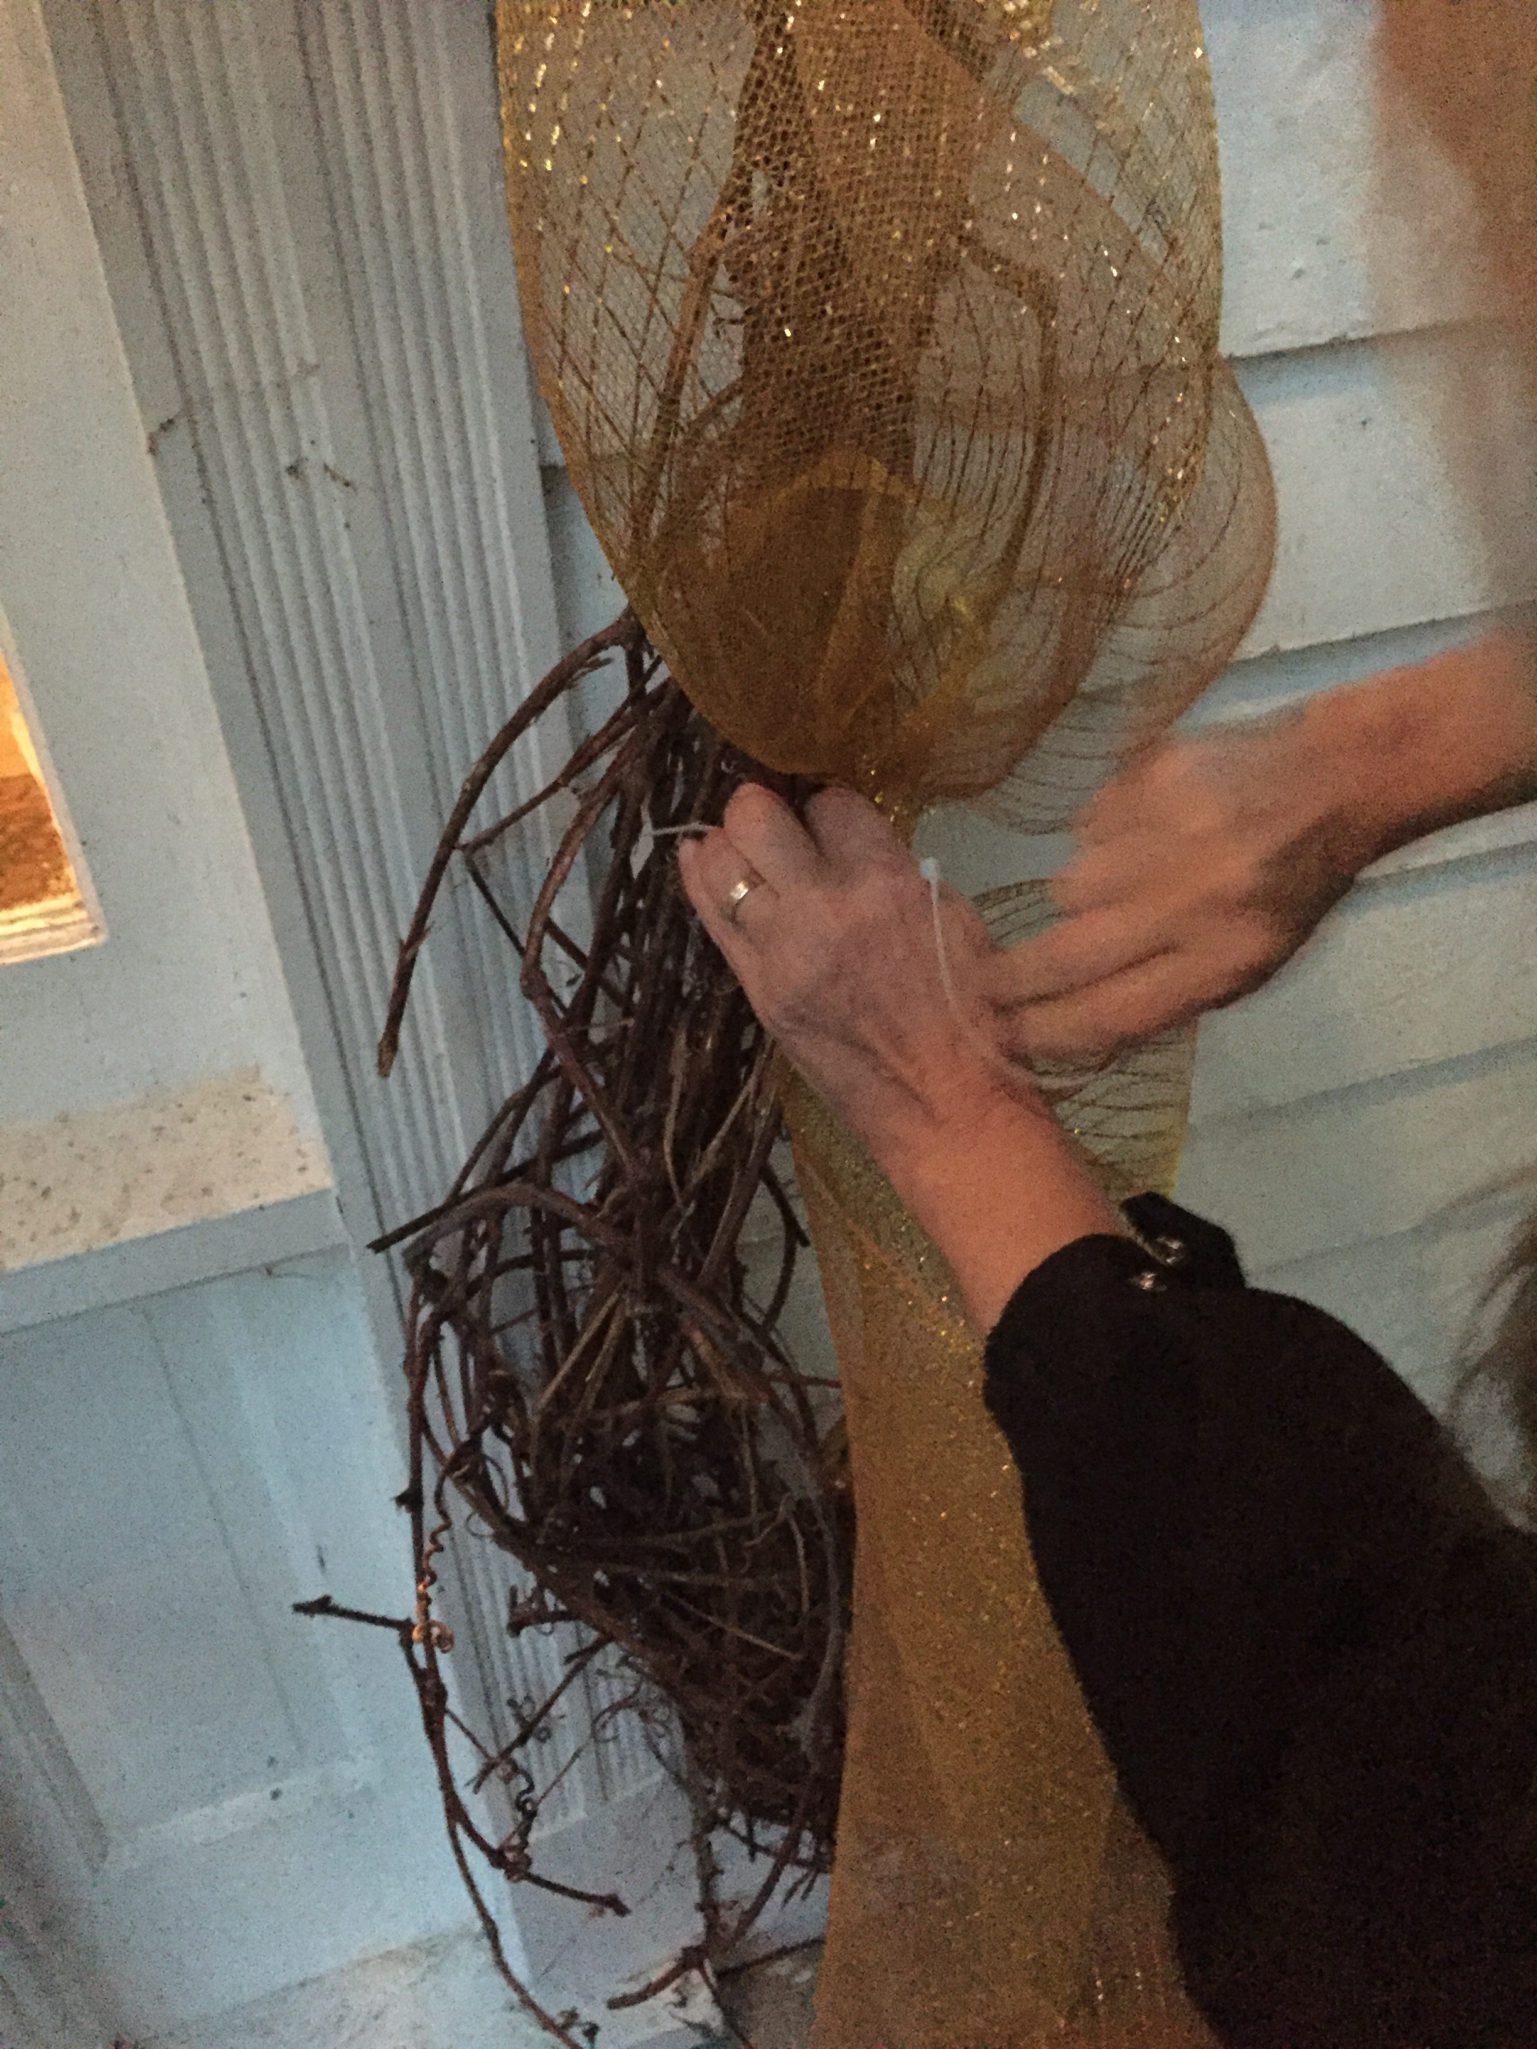
2. Attach the 2 rolls of mesh ribbon and secure them in the middle of the top of the grapevine swag with a zip tie.
3. Take the mesh ribbon and begin to make puffy loops and secure each mesh ribbon loop to the grapevine swag with a zip tie.
4. Beautiful just like this; however, the more layers you add, the more professional it looks.
5. Add a second layer. I used the 2nd Color. Use 2 rolls of mesh ribbon. Secure them together and fasten them to the middle of the top of the grapevine swag with a zip tie. Repeat what you did in Step 3, this time filling in the gaps that the first ribbon missed.
6. You could stop there…..but why, the more, the better…
7. Take your fall swag and secure it to the top middle of the grapevine swag with a zip tie. Weave the fall swag on top of the mesh ribbon, securing where it needed with a zip tie. You can use individual floral sprigs of fall pumpkins, leaves, etc., however, tuck the stems into the grapevine wreath and zip tie them to the swag.
8. My little helpers for this project were Rachel, my 21-year-old disabled daughter, and our rescue dog Ben.
9. Place a bow that you made or bought in the center at the top of the door.
TIP–PLAN AHEAD; place the mesh ribbon layers in the order that you would take them down. Example: Hang the gold mesh ribbon 1st, as a base. When you remove the fall decorations, it is ready for Christmas decorations. An additional layer of red mesh ribbon would look beautiful for fall and Christmas. (I used brown mesh ribbon in photos above)


